【#冬至 魔法湯圓食譜大公開!】
今天是一年當中黑夜最漫長的一天
也是大家吃湯圓、慶圓團的大日子
但為了讓海外的魔法同仁和外國朋友
也能夠在嚴峻的疫情下
自己動手吃上一碗暖呼呼的湯圓
小編決定...
將!獎!
公布 #國際雙語版湯圓食譜!(全家福 4 人份)
材料:
1. 糯米粉 600 g
2. 熱水 300 g
3. 冷水 180 g
4. 紅麴粉或紅肉火龍果少許 (染色用) (買不到可用甜菜代替)
5. 黑糖水 (黑糖 800 g + 水 2 公升 + 薑少許)
步驟:
1. 糯米粉倒入熱水攪拌均勻
2. 再倒入冷水攪拌
3. 用手揉成米麵糰直到呈「耳垂柔軟」狀態
4. 另分出一部分麵團染色
5. 將揉好的麵團搓成長條再切成一個個適當小塊
6. 將麵團塊搓成圓球即完成生湯圓
7. 煮一鍋滾水加入黑糖並放入生湯圓和薑
8. 湯圓浮起水面後 5 分鐘即可關火盛碗
9. 好好享用吧!
#湯圓作法千千百百種就看大家怎麼自己變魔法惹
#正向防疫
#2030雙語國家
Today is the #WinterSolstice, the shortest day and longest night of the year and a day when it’s traditional to eat #tangyuan (glutinous rice dumplings) to stave away the cold of winter. We thought we’d share the recipe so that everyone can get a taste of this #SweetTreat wherever they are in the world! If you do have a go, why not share a picture in the comment section below!
Ingredients (serves 4):
For Tangyuan:
Glutinous Rice Flour 600g
Hot water: 300ml
Cold water: 180ml
Pinch of monascus powder, red dragon fruit, beetroot or red food coloring (optional)
For sweet soup:
2 liters of water
800g brown sugar (adjust amount as desired)
Pinch of ground ginger (adjust amount as desired)
Recipe:
1. Pour the glutinous rice flour into the hot water and stir evenly.
2. Pour in the cold water and stir.
3. Use your hands to roll the dough into ball (it should be the consistency of your ear lobe).
4. You can split it in two at this point and add the food coloring to the second batch.
5. Roll it into a long cylinder shape, and use a knife to cut it into small pieces.
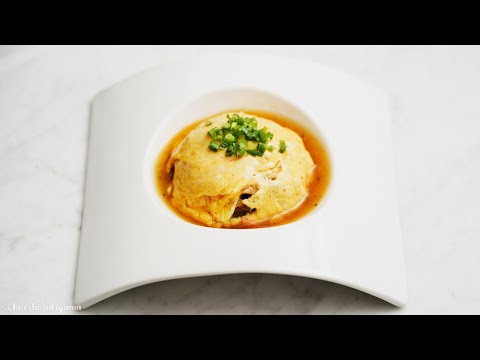
6. Roll these into small balls (about the size in the picture).
7. Bring the water for the soup to the boil and add the brown sugar, the ginger and the tangyuan.
8. Five minutes after the tangyuan have floated to the top, you can serve in a bowl.
9. Bon Appétit!
photo credit: https://flic.kr/p/94oc9X
同時也有11部Youtube影片,追蹤數超過70萬的網紅てぬキッチン/Tenu Kitchen,也在其Youtube影片中提到,〓〓〓〓〓〓〓〓〓〓〓〓〓〓〓〓〓〓〓〓〓〓〓〓〓〓 \てぬきおやつの続編!!てぬきごはんが発売になりました♪お陰様で発売10日で5万部に、本当に本当にありがとうございます!/ 『世界一ラクチンなのに超美味しい!魔法のてぬきごはん』 ↓ https://www.amazon.co.jp/dp/484...
「pinch point」的推薦目錄:
- 關於pinch point 在 外交部 Ministry of Foreign Affairs, ROC(Taiwan) Facebook 的最佳解答
- 關於pinch point 在 YossieBistro Facebook 的最佳解答
- 關於pinch point 在 混血樂樂與太陽妹妹 Abner & Aasta Facebook 的精選貼文
- 關於pinch point 在 てぬキッチン/Tenu Kitchen Youtube 的最讚貼文
- 關於pinch point 在 Tasty Japan Youtube 的精選貼文
- 關於pinch point 在 生かし屋 IKASHIYA CULINARY ART Youtube 的最讚貼文
pinch point 在 YossieBistro Facebook 的最佳解答
All-Day Breakfast: Scrambled Eggs on top of Toasted Brioche and the side of Salad Greens.
มารื้อฟื้นภาษากันซักโพสต์นะคะ ง่ายๆ โพสต์หน้ากลับภาษาไทยค่ะ😉
I intentionally made this clip without any background music just to prove my point that when making breakfast eggs, you don't need any sizzling sound. Low heat is definitely the key here.
I started off with just a simple salad for the side. Mixing your greens to make your salad interesting. The vinaigrette couldn't be any simpler: a spring of fresh thyme, lemon zest, pinch of salt, couple cracks of black pepper, juice of half a lemon and half a tablespoon of EVOO.
I use 2 eggs and when it comes to breakfast eggs, I prefer half and half, which is no avail in Thailand. So I put equal part of whipping cream and milk to make my own halves. About half a tablespoon of each. Pinch of salt and that's it.
I will only put the heat on for the bread and absolutely no heat for scrambled eggs.
So Medium-Low heat and melt some butter, then toast the bread directly in the pan. Grill to perfection and put it on the plate.
Now, put off the fire. I will only use the carryover heat to scramble the eggs. Seriously, that's all the heat you need to cook the breakfast eggs.
Cool down the pan a little bit by melting a little butter, then pour in the beaten egg. Fluffing the egg with a spatular or a whisk or chopsticks, whatever turns you on. Don't cook through, you need the egg to be fluffy and a little liquidy. I now sprinkle some cayenne pepper onto it. No black pepper cause I prefer the red dust to the black dots on my eggs.
Put everything together. Make it pretty. Breakfast is cute and yummy. And you can enjoy it any time of the day. I used to drive to the diner at 2am to enjoy a piece of toast and omelette. Well, it's my thing. Breakfast is my fuel😘😋
#WhatIEatToday
pinch point 在 混血樂樂與太陽妹妹 Abner & Aasta Facebook 的精選貼文
#孩子坐車一定要坐汽座
孩子坐車一定要坐汽座
孩子坐車一定要坐汽座
很重要
講三次可能還不夠
除了要坐汽座
怎麼坐也很重要
現在樂樂已經改坐前向了
(腳太長也是一種問題 🤷♀️)
記得安全帶一定要綁緊喔
#自己的孩子自己保護
#汽座的重要性
<<家長最常犯、關於汽車安全座椅的錯誤>>
㊙如果我跟你說世界上有一種很棒的藥,沒有副作用、不用花大錢,卻可以有效降低71%新生兒死亡率、54%幼兒死亡率。不知道你是不是會聽了很心動?很想問我哪裡可以買?
Well #正確安裝跟使用安全座椅就是解藥。
我在PICU(兒科加護病房)時不只一次見到沒有坐在安全座椅(或是有坐安全座椅,椅子卻沒用安全帶固定…WTH???!!!) 而重度昏迷的小病人。家長貪圖一時方便害了小孩,看了實在痛心。
我們醫院的兒童乘客安全部門有好幾位兒童乘客安全技師(child passenger safety technician,需要認證)專門教導家長如何正確安裝汽車安全座椅。只要預約,他們就會花30-40分鐘查看你的車子、你的安全座椅以及你寶寶的特殊需求(譬如早產兒、剛上完石膏等),教導你如何正確安裝使用汽座以及其他汽車安全相關知識。上星期五grand round(全院性會議)邀請到一位院內的資深技師來幫我們上課,受益良多。內容節錄如下:
✅購買汽車座椅三大重點: 要適合小孩要求、要適合車子規格、你知道也有能力正確使用這個汽座。所有的汽車安全座椅都需要達到聯邦安全標準,貴的廠牌不見得就是最合適的(譬如可能很重、媽媽一人無法安裝等)。
✅後向比前向安全。詳細閱讀你家汽座關於後向的年齡身高體重限制(每個汽座不同),盡量讓小孩後向越久越好。
🈲絕對不要把「後向汽座」放在有安全氣囊的座位(譬如前座)。只要安全氣囊膨脹,小孩必死無疑(被擠壓)。
✅轉為前向之後,盡量使用5 point harness(中文叫五點安全帶?)直到到達身高體重限制。
✅在我們州,法律規定小孩八歲之前一定要使用安全座椅,除非小孩身高達到4 feet 9 inches(約145cm)及體重80磅(36kg)。如果小孩不夠高又沒有坐booster seat,安全帶就會落在錯誤的位置(脖子跟肚子),發生車禍時反而危險。
✅安全帶正確的位置: 上方安全帶應落在鎖骨中央、下方安全帶則是在大腿上。
🈲未滿13歲不要坐前座。
🈲大部分的汽座飾品都沒有經過撞擊測試。除非你的汽車安全座椅廠商有特別推薦,否則不建議額外購買。
✅汽車座椅”有”使用期限。如果要購買二手的汽座也請務必確定該款汽座沒有安全疑慮(像是recall)、沒有發生過車禍等。
✅很多家長怕小孩子不舒服,安全帶都不夠緊。但安全帶需要緊貼孩童(pinch webbing test,請看下面圖片)才有最佳保護效果。
✅注意汽車座椅該有的傾斜度,請詳細閱讀說明書。像是如果把汽車提籃平放,嬰兒的頭就很容易滑下來。
✅如果汽車有top tether(看圖),請務必使用。可大大減少座椅移動程度。
🚼綜合以上,安全度排行: 後向 > 前向5 point harness > 前向booster seat + 保留背板(除非小孩頭已超過背板高度) > booster seat。
最後的最後是,車裡的每一個人都務必要繫安全帶。發生車禍的當下,#沒有繫安全帶的人就是移動的武器,也可能是造成死亡的元凶!!!
pinch point 在 てぬキッチン/Tenu Kitchen Youtube 的最讚貼文
〓〓〓〓〓〓〓〓〓〓〓〓〓〓〓〓〓〓〓〓〓〓〓〓〓〓
\てぬきおやつの続編!!てぬきごはんが発売になりました♪お陰様で発売10日で5万部に、本当に本当にありがとうございます!/
『世界一ラクチンなのに超美味しい!魔法のてぬきごはん』
↓
https://www.amazon.co.jp/dp/4847099621
\15万部突破!!お菓子レシピ本大賞♪/
『材料2つから作れる!魔法のてぬきおやつ』
↓
https://www.amazon.co.jp/dp/484709879X/
Amazon、その他ネット書店、全国の本屋さんで販売していただいております!
ぜひチェックしていただけると嬉しいです♪
〓〓〓〓〓〓〓〓〓〓〓〓〓〓〓〓〓〓〓〓〓〓〓〓〓〓
▽〝やみつきレタス〟の詳しいレシピはこちらのブログから♪
『てぬキッチンのブログ』⇒ https://www.tenukitchen.com/entry/2020/10/10/221542
▽twitterもやっているので、もし『てぬキッチン』のレシピをお試し頂いたら、#てぬキッチン をつけて投稿してもらえると嬉しいです♪
『てぬキッチンのtwitter』⇒ https://twitter.com/tenu_kitchen
【やみつきレタス】
今日は、一瞬で作れるくらいに超簡単な『やみつきレタス』を作りました!
レタス、これにすると速攻で無くなる人気メニュー!
ちょっと早いかなくらいの炒め具合がPOINTで、シャキシャキ感が残っているけどしんなり感もありで、この味付けがピッタリ!
レタスを簡単に美味しく食べたい時にはぜひこの『やみつきレタス』をお試しください。
〈材料〉
レタス 1/2玉
ごま油 大さじ1/2
オイスターソース 大さじ1
鶏がらスープの素 ひとつまみ
▽チャンネル登録はこちらから♪
⇒http://www.youtube.com/channel/UC1HZhN0HjriRUhqH7wGyRQg?sub_confirmation=1
【Lettuce that you can eat a lot】
Today, I made a super-simple "addictive lettuce" that can be made in an instant!
Lettuce, a popular menu that disappears with haste!
The point is that the stir-fry condition is a little early, and the crispy feeling remains, but there is also a supple feeling, and this seasoning is perfect!
If you want to eat lettuce easily and deliciously, please try this "addictive lettuce".
〈INGREDIENT〉
1/2 lettuce
1/2 tablespoon of sesame oil
1 tbsp oyster sauce
A pinch of chicken broth
▽Subscribe to my channel♪
⇒http://www.youtube.com/channel/UC1HZhN0HjriRUhqH7wGyRQg?sub_confirmation=1
◎お仕事の依頼等はこちらまで→tenukitchen_tenukin@yahoo.co.jp
------------------------------------------------------------------------------
楽曲提供:フリーBGM DOVA-SYNDROME by http://dova-s.jp/
効果音素材:ポケットサウンド – https://pocket-se.info/
------------------------------------------------------------------------------

pinch point 在 Tasty Japan Youtube 的精選貼文
みんな大好きチョココロネ♡
よく見たらアイスのコーンに似てるかも?
アイスとコロネが一緒に食べられるなんて…幸せすぎるっ!
最高に贅沢なひんやりスイーツを、ぜひ作ってみてくださいね♪
手作りコロネアイスクリーム
8人分
材料:
お湯 120ml
グラニュー糖 大さじ2 + 小さじ1 (分けておく)
ドライイースト 小さじ2 ¼
薄力粉 375g + 適量 (必要に応じて)
塩 ひとつまみ
牛乳 (温めておく) 120ml
無塩バター (溶かしておく) 大さじ5
卵黄 (室温に戻しておく) 大2個
オリーブオイル 大さじ1
溶き卵 大1個分
盛り付け用
グラニュー糖 200g
シナモンパウダー 小さじ2
チョコレート (溶かしておく) 225g
レインボースプリンクル お好みで
アイスクリーム
作り方:
1.大きなボウルにお湯とグラニュー糖小さじ1を入れて混ぜる。そこにドライイーストを振り入れ、泡が立つまで5分ほど休ませる。
2.薄力粉、グラニュー糖大さじ2と塩を合わせてふるいにかけ、(1)に加える。
3.温めた牛乳、溶かしバター大さじ3、卵黄を加える。生地がボール状になるまでかき混ぜる。生地に粘り気がある場合は、薄力粉を足す。
4.生地の外側がなめらかになり、指で押さえると跳ね返るまで、5分ほどこねる。
5.ボウルにオリーブオイルを塗り、生地をボウルに戻してラップで覆う。
6.生地が2倍の大きさになるまで、1時間ほど室温で置いておく。
7.オーブンを190°Cに予熱しておく。
8.生地を8等分に切る。
9.生地を太く長い帯状に丸める。
10.アルミホイルのシートを半分に折り、右下隅から斜めに巻き始めてコーン型を作る。計8個のコーンを作る。
11.各アルミコーンの周りに帯状の生地を巻きつける。
12.マフィン型に生地を巻きつけたコーンを尖った部分を上にして並べる。溶き卵を塗る。
13.焼き色がつくまで18−20分焼く
14.10分冷ます。
15.大きな皿にシナモンパウダーと残りのグラニュー糖を入れ混ぜておく。
16.残りの溶かしバターをコーンに塗る。
17.慎重にアルミホイルを剥がす。
18.シナモンシュガーの上でコーンを転がす。
19.コーンの中に溶かしたチョコレートを流し入れ、余分なチョコレートは滴り落とす。上にアイスクリームをのせる。お好みでコーンのふちを溶けたチョコレートにつけ、レインボースプリンクルの上で転がし、アイスクリームを上にのせたら、完成!
---
『Cinnamon Sugar Donut Cones』
for 8 servings
Ingredients
½ cup warm water(120 mL)
2 tablespoons granulated sugar, plus 1 teaspoon, divided
2 ¼ teaspoons active dry yeast
3 cups all-purpose flour(375 g), plus more as needed
1 pinch salt
½ cup warm milk(120 mL), of your choice
5 tablespoons unsalted butter, melted, divided
2 large egg yolks, room temperature
1 tablespoon olive oil
1 large egg, beaten
FOR SERVING
1 cup granulated sugar(200 g)
2 teaspoons ground cinnamon
1 cup chocolate(225 g), melted
rainbow sprinkle, optional
ice cream
Preparation
1.In a large bowl, stir together the water and 1 teaspoon sugar.
2.Sprinkle the yeast over the water mixture and rest for 5 minutes, or until it becomes foamy.
3.Sift together the flour, 2 tablespoons sugar, and the salt over the
yeast mixture.
4.Add the milk, 3 tablespoons melted butter, and the egg yolks. Stir until the dough comes together in a ball. Add more flour if dough is too sticky.
5.Knead the dough for five minutes, or until the dough is smooth on the outside and springs back when pressed on with your fingers.
6.Grease bowl with the oil, return the dough to the bowl, and cover with plastic wrap.
7.Let rise for one hour at room temperature, or until the dough has doubled in size.
8.Preheat the oven to 375°F (190°C).
9.Cut the dough into eight equal parts.
10.Roll out each piece of dough into a long, thick strip.
11.Fold a sheet of aluminum foil in half and, starting from the bottom right hand corner, roll into a cone shape, measuring 6 inches (15 cm) long and about ⅛-inch (3 mm) thick around the opening. Repeat to make 7 more cones.
12.Wrap the dough strips around each aluminum cone.
13.Arrange the cones point-up in a muffin tin. Brush with egg wash.
Bake for 18-20 minutes, or until golden brown.
14.Cool for 10 minutes.
15.On a large plate, mix the cinnamon with the remaining sugar.
16.Brush the cones with the remaining melted butter.
17.Carefully remove the aluminum foil.
18.Roll the cone in cinnamon sugar.
19.Fill the cone with melted chocolate, letting the excess drip out. Top with ice cream, or dip the edge in chocolate, then roll in rainbow sprinkles, if desired. Top with ice cream.
20.Enjoy!
#TastyJapan #レシピ
MUSIC
Licensed via Audio Network

pinch point 在 生かし屋 IKASHIYA CULINARY ART Youtube 的最讚貼文
【材料】
・干し椎茸の戻し汁 320g
・酒 大さじ1.5
・醤油 大さじ1.5
・砂糖 大さじ1
・酢 小さじ1
・オイスターソース 小さじ1/2
・鶏ガラスープの素 小さじ1/2
・塩 ひとつまみ
・黒胡椒 少々
・片栗粉 小さじ2~大さじ1
・水 大さじ1
・ごま油 小さじ1
・卵 4個
・干し椎茸 3個
・カニカマ 3本
・長ネギ 1/2本
・塩 ひとつまみ
・油 大さじ1.5(卵1回分)
・ごはん 1人前お茶碗1杯分
【準備】
・干し椎茸に400mlくらいの熱湯を注いで戻す
・長ネギを縦半分に割り、斜めにスライスする
・カニカマを割く
・戻した干し椎茸をスライスする
【作り方】
1. 鍋にあんの材料(水溶き片栗粉以外)を入れて中火にかける
2. 沸騰したら火を消し、片栗粉小さじ2~大さじ1を水大さじ1で溶いた水溶き片栗粉を加えながら混ぜる
3. 再度中火にかけて混ぜながら加熱し、再沸騰してとろみがついたら火からおろしごま油小さじ1を混ぜる
4. ボウルに卵4個と干し椎茸・カニカマ・長ネギ、塩ひとつまみを入れて溶き混ぜる
5. お皿にご飯を用意しておき、フライパンに油大さじ1.5(サラダ油大さじ1・ごま油大さじ1/2)を中火で温める
6. 卵液を垂らしたらじゅっとなるくらいまで温まったら、卵液を1人分入れ素早くかき混ぜる
7. 半分くらいが半熟になってきたら周りの卵を中心に折り込むイメージで円形に整える
8. 底面がかたまって、表面が半熟の状態で火を止め、ごはんの上に被せる(卵はひっくり返してもOK)
9. 温めたあんをかけ、万能薬ねぎをのせて出来上がり
動画でよく使ってる調理器具
フライパン(20cm):https://amzn.to/2QyY1ny
フライパン(24cm):https://amzn.to/2UtNvz5
フライパン(24cm深型):https://amzn.to/3dj5DEp
鉄フライパン(22cm):https://amzn.to/3a8hqmR
アルミフライパン(24cm):https://amzn.to/3dj6tRz
片手浅型鍋(18cm):https://amzn.to/2QzGXha
片手浅型鍋(21cm):https://amzn.to/2U7ta3o
片手鍋(16cm):https://amzn.to/2QzCj2x
片手鍋(20cm):https://amzn.to/3bd0lZa
ソースパン:https://amzn.to/2U9keuI
まな板:https://amzn.to/2J1fQHI
ガスコンロ:https://amzn.to/3bdtvYa
牛刀:https://www.jikko.jp/fs/jikko/54803
ペティ:https://www.jikko.jp/fs/jikko/54800
撮影機材
カメラボディ:https://amzn.to/2xSXZAd
動画レンズ:https://amzn.to/2UteU3V
写真レンズ:https://amzn.to/2U7HcCb
録音:https://amzn.to/2U9cGYT
※製品のURLはAmazonアソシエイトのリンクを使用しています
ブログ:http://www.ikashiya.com/
Twitter:https://twitter.com/sakihirocl
Instagram:https://www.instagram.com/sakiyamahiroshi/
↓using translation software.
[Materials]
・320 g of the soaking liquid from the dried shiitake mushrooms
・1.5 tbsp sake
・1.5 tbsp soy sauce
・1 tbsp sugar
・1 tsp vinegar
・Oyster sauce 1/2 teaspoon
・1/2 tsp chicken stock powder
・a pinch of salt
・a pinch of black pepper
・2 teaspoons to 1 tablespoon of katakuriko
・1 tbsp water
・Sesame oil: 1 teaspoon
・4 eggs
・3 dried shiitake mushrooms
・Imitation crab stick 3 sticks
・1/2 Japanese leek
・a pinch of salt
・1.5 tablespoons oil (a batch of eggs)
・Rice, 1 serving, 1 tea bowl
[Preparation]
・Pour about 400 ml of hot water back into the dried shiitake mushrooms.
・Cut the Japanese leek in half lengthwise and slice it diagonally.
・Crack the crab stick.
・Slice the rehydrated dried shiitake mushrooms.
[How to make]
1.Add the ingredients for the ankake (Except for potato starch dissolved in water) in the pot and cook it over medium-heat.
2.When it comes to a boil, turn off the heat, and mix in 2 to 1 tablespoon of potato starch dissolved in 1 tablespoon of water.
3.Heat it again over medium-heat while mixing it. When it boils again and thickens, take it off the heat and mix 1 teaspoon of sesame oil.
4.Add 4 eggs, dried shiitake mushroom, crab stick, Japanese leek and a pinch of salt in a bowl and mix it.
5.Prepare the rice in a plate and heat 1.5 tablespoons of oil (1 tbsp vegetable oil, 1/2 tbsp sesame oil) in the pan over medium-heat.
6.Once the egg mixture drips and has warmed to the point where it becomes moist, add the egg mixture for 1 person and stir quickly.
7.When half of the egg is half-done, fold the egg around the center to form a circle.
8.Turn the heat off when the bottom has hardened and the surface is half-done. Cover the rice (You can flip the egg.).
9.Pour on the warmed sauce, top with the green onions and it's done.
